When you use your iPhone to take and manage your photographs you have probably noticed a wide range of symbols that appear.
Apple calls these symbols “badges” or “status icons” and they are used to quickly and easily show different actions or effects that have been performed on your photos.
Some badges are easy to interpret, while others can be a little confusing as the icon Apple selected does not describe the feature applied to the picture very well.
In this short guide you will find out:
- The badges Apple assigns to photos on your phone and what they mean.
- The meaning of symbols and icons when taking a photo using the iPhone camera.
- The icons Apple uses in the Photos Library app.
If you would like to know more about icons found on the status bar of your Apple device, see iPhone symbols and icons.

Advertisement
Where do you see these photo symbols?
These symbols appear when editing a photograph, on the photo themselves, or when you take a picture using your iPhone.
See our other guides on iPhone Photos, including How to recover permanently deleted photos from iPhone
iPhone photo library status badges
When you edit a photo a status icon is used as a shortcut to show a change has been made.
Symbols are also displayed to show the types of media in the library and the features they use.
When you edit a photo you can use icons to access the edit features.
All of these badges, icons, and symbols are explained in the table below.
| Symbol / Badge / Icon | Meaning |
| Photo has been edited. | |
| Photo has had keywords applied. | |
| Photo’s location has been identified on a map. | |
| Photo has been marked as a favourite. | |
| Item is a video, slo-mo or time-lapse clip. | |
| Original photo was taken as a High Dynamic Range (HDR) photo that combines three photos taken at different exposures. | |
 | Original photo was taken as a RAW + JPEG photo that includes a RAW and JPEG version. (The badge appears as an R when viewing the RAW version of a photo.) |
| Item is a Live Photo. | |
| Item is a Live Photo set to bounce. | |
| Item is a Live Photo set to loop. | |
| Item is a portrait photo. | |
| Photo is panoramic. | |
| Rotate photo. | |
| Flip photo. | |
| Photo filters and effects. | |
| Draw on photo. | |
| Visual lookup. |
For more information, see Edit photos and videos on iPhone.
Visual lookup automatic detection tool for photos
Since iOS 16, Apple has introduced visual lookup which allows you to identify animals, plants, landmarks and more in your photos. It can even identify food and provide recipes that include it as an ingredient.
Advertisement
You can tell with visual lookup is available as a star appears at the top left of the info icon when looking at the photo.
To use it, do the following:
- In the photo gallery open a picture in full screen or pause a video on any frame.
- Tap the starred Info button
- Select Look Up at the top of the photo information to see the results.
To find out more, see Use Visual Look Up to identify objects in your photos and videos on iPhone.
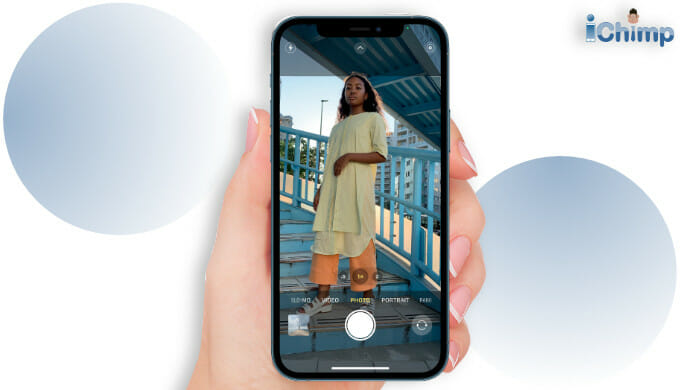
On-screen icons when taking a photo
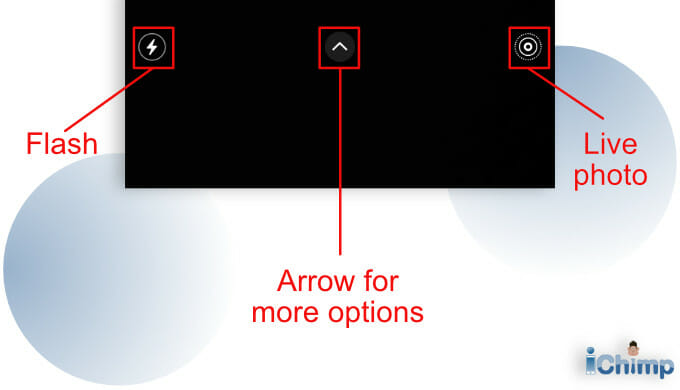
At the top of the screen, there are a number of symbols that control the camera settings:
- Flash
The flash can be on, off, or put in auto mode. - Live Photo
Shoots 1.5 seconds of video before and after the photo is taken giving a snippet of movement together with the image. This is on by default and can take up a lot of space. - Arrow
Tap the arrow to display further settings.
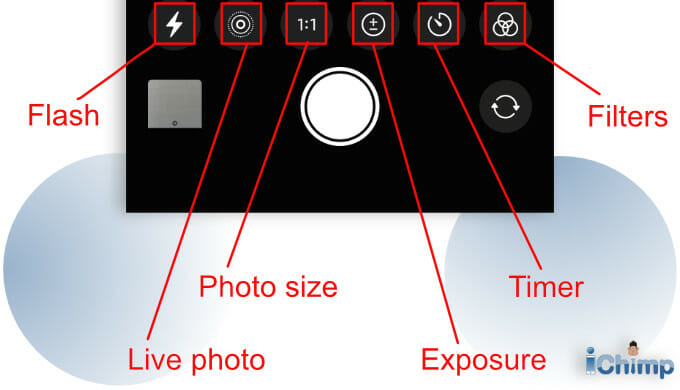
There are further settings found by pressing the arrow. These appear at the bottom of the screen:
- Flash
- Live photo
- Timer
Set a photo timer for between 3 to 10 seconds. - Photo size
Change the shape of the photo between 4:3, 16:9, or square. - Exposure
Change the exposure. - Filters
Apply effects to the photograph such as Mono, Tonal, Noir, Fade, Chrome, Process, Transfer, and Instant.
If any of these settings are turned on, the symbol appears at the top of the screen as a reminder.
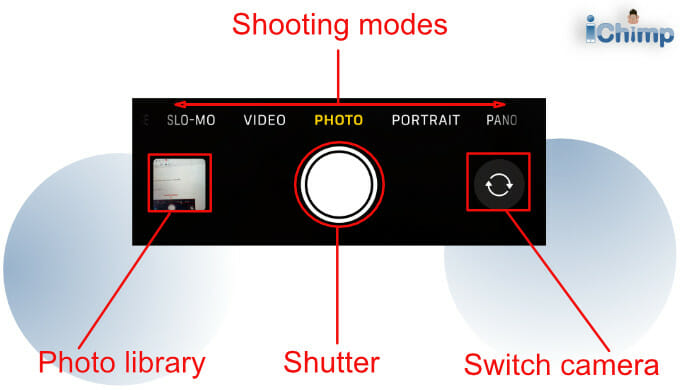
Also at the bottom of the screen are other important icons:
- Shooting mode
Pick the type of photo or video you’d like to shoot. - Camera rotate
Switch between the front-facing and rear-facing cameras. - Shutter
Press to take the picture. - Photo library
Opens the photo library.
To find out more, see iPhone camera basics.


Hi Kevin, I’m requesting your help with a series of numbers and letters that were at the top of a photo sent to my iPhone. I’m trying to determine if it was an actual Live Photo or an image from something else . Here’s the number information:
45EB17DB-4F47-4B9C-92
Thankyou for your help!!