If you have accidentally deleted important pictures from your iPhone try not to panic as there are several ways to recover deleted photos.
This article will teach you the following photo recovery techniques using easy-to-follow instructions and screenshots:
- Recover deleted iPhone photos without a computer
- Recover permanently deleted photos from a time machine backup
- Recover deleted iPhone photos using a 3rd party photo storage platform
- Recover permanently deleted iPhone photos using a backup
- Recover deleted iPhone photos from iCloud
All the methods listed here are free so you don’t have to pay for expensive apps or software tools.
After you get your photos back, you need to avoid wiping them again in the future. This is why this guide explains techniques to avoid iPhone photos being deleted permanently in the first place.

Advertisement
How to recover your deleted iPhone photos
Method 1: Recover deleted photos without a computer
You can restore pictures from your device by simply taking them out of the ‘Recently Deleted’ folder within the Photos App. It’s quick and easy and works on all modern iPhones.
This is by far the quickest and easiest way to restore your pictures from your iPhone but it only works if:
- You didn’t delete the images more than 30 days ago
- You haven’t removed the pictures permanently from the ‘Recently Deleted’ folder on your device
If you have done one, or other of these 2 things you won’t be able to recover your photographs using this method and you should try one of my other suggestions.
Instructions
On your iOS device:
- Tap the Photos app to Open it

- At the bottom tap Albums and you will be taken to My Albums

- Scroll all the way down to the bottom and tap Recently Deleted

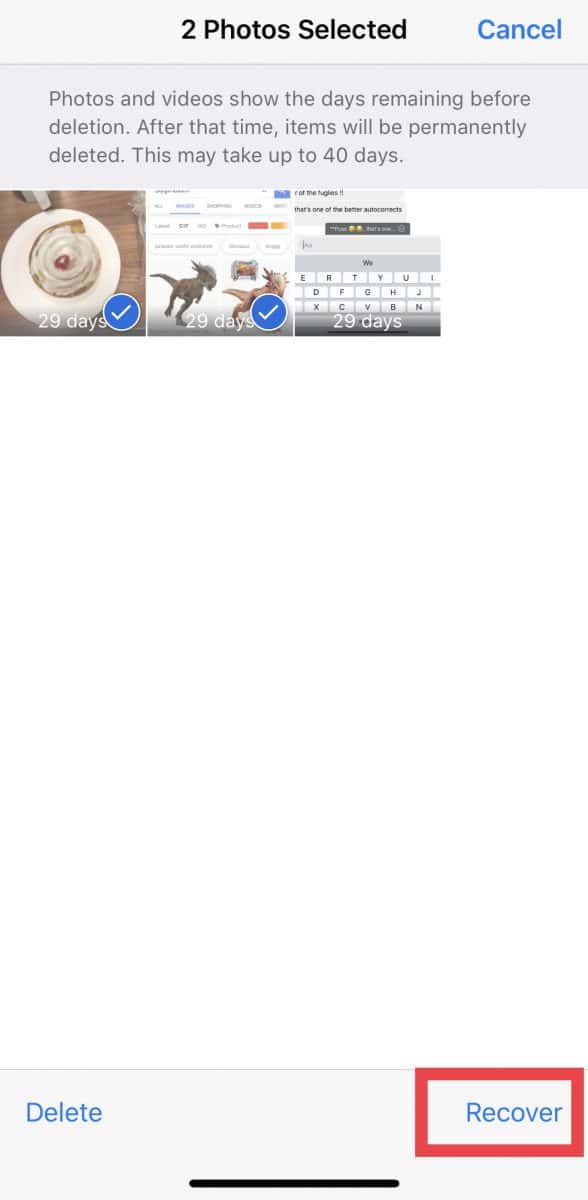
- Tap Select in the top right and tap all of the pictures you want to restore

- At the bottom right tap Recover to restore the photo


Method 2: Recover permanently deleted photos from a ‘Time Machine’ backup
This method relies on you owning a Mac computer running ‘Time Machine’ backup software. If you don’t, then this option won’t work and you should try one of the other options.
It is worth mentioning that if you don’t have a Mac then you are less likely to have turned on the iCloud Storage Library feature as you don’t have a computer to sync your pictures with. This means you are probably able to recover your photographs using iTunes or iCloud.
Advertisement

Instructions
- Go to the “Pictures” folder.
- Locate the file named “Photos Library.photoslibrary”
- Right-click (or Control+Click) on “PhotosLibrary.photoslibrary” and choose “Show Package Contents”
- Click on the Masters folder and navigate through the month and year of when the picture was taken.
- Open Time Machine by clicking on the icon in the menu bar and choosing Enter Time Machine, or if you have a Time Machine icon in your Dock just click on it.

- You can use the up arrow to go back through the backups until you get to the date where you still had the pictures on your iPhone.
- Look through the folder to find the deleted or lost picture. You can press Space Bar to preview it and check its the one you want.
- Click Restore to restore the photo to the computer.
- The Photos App will synchronize the missing photo back onto the iPhone, but be patient it may take a few minutes.


Method 3: Recover permanently deleted photos from a 3rd party photo storage platform (such as Google Photos) without a computer
This method only works if you have already installed a third-party app on your iPhone. If you haven’t, I recommend you install Google Photos as it allows you to backup lots of pictures to your Google account for free.
If you don’t want to use Google products then other cloud solutions are available such as Dropbox, OneDrive, Box, and others.
If you are sensible enough to use a 3rd party photo app like Google Photos then well done, you will be able to recover the iPhone data.
Google Photos, is a free App that gives you unlimited storage space for all your Photos. Once installed you simply click the icon and the App will upload all your pictures in “original quality”. Confusingly, this isn’t the same quality as the original iPhone picture (which Google calls “high quality”), but it is still very good.
Once installed, if you delete a picture from your iPhone it will still be on Google Photos. You can then look at the image using Google Photos, or download it to your iPhone again so it appears in your photo gallery.
The first time you upload content it is best done on Wi-Fi as it can be a slow process. It also uses a lot of battery power so it is best done overnight whilst your phone is plugged into a power source.
Google Photos also allows you to backup video too.
Using this App is a great way of creating space on your iPhone whilst still keeping all your pictures and video in an easily accessible location.
Instructions
To recover pictures from Google Photos to your iPhone:
- Tap the Google Photos icon

- Scroll through the images and find the one you wish to restore to your iPhone
- Open the image and take a screenshot of it
- The screenshot will appear in the bottom left of the iPhone screen, tap it
- Click Done at the top left of the screen
- Click Save to Photos
- The image will be saved in your Photo album
Although you can use the process to restore lost photos from your iPhone, the question is why bother? You can view, edit and send pictures directly from Google Photos so there isn’t any need to have a copy on your iPhone.
In fact, the only reason I can think of wanting a local copy of the picture is that you don’t have a WiFi or Cellular connection (The app keeps iPhone pictures in the cloud so you need an internet connection to view pictures).
Method 4: Recover permanently deleted photos using an iTunes backup
This method will only work if you don’t have the iCloud Photo Library enabled.
For this method to work you need to have previously backed up your device to iTunes.
Important: When you follow this procedure you will wipe all the data currently on your iPhone, including any new photos you have taken. You should backup your iPhone before you proceed so you have the latest version of your data stored safely in a backup in case you need it.
I would also advise you install Google Photos to backup all your pictures from your iPhone before you begin.
What you need
- Your iPhone, iPad or iPod Touch
- A lightning or 30-pin cable (depending on the age of your device)
- The PC or Mac you use to perform the iTunes backups
Instructions
- Connect your iPhone to your computer using the lightning cable or 30-pin cable and open iTunes.
- If you have connected to this computer previously you should not be asked for a passcode or to Trust This Computer. If you are, try rebooting your iPhone, iPad or iPod Touch while it is still connected.
- Select your iPhone, iPad, or iPod touch when it appears in iTunes.

- Select “Restore Backup” in iTunes.
- Look at the date of each backup and pick the one that is likely to have the photos in it.
- Click Restore.
Method 5: Recover deleted photos from iCloud
Option 1: recover your photos from iCloud Recently Deleted items
This method is worth a try but if you have waited more than 30 days, it is unlikely to work and you should try one of the other methods.
Instructions
- Go to https://www.icloud.com/ and sign in using your Apple ID
- Click Photos

- Select Recently Deleted from the menu on the left

- Select the photos you want to recover from the right pain, use Command-Click to select multiple pictures.
- Click Recover from the top right to restore the images


If the pictures are not in Recently Deleted you need to restore your iPhone from an iCloud backup.
Option 2: restore permanently deleted photos on iPhone using an iCloud backup (without a computer)
This method will only work if you don’t have the iCloud Photo Library enabled.
Restoring from an iCloud backup involves deleting all the contents and settings on your iPhone and restoring them. This is a major task that will take several hours so be certain you have enough time.
You should also backup your iPhone before you proceed so you have the latest version of your data in case you need it. I would also advise you to install Google Photos to back up your photos before you begin.
Only perform an iCloud restore via WiFi and if your iPhone has 75%+ battery power and access to a power source.
Instructions

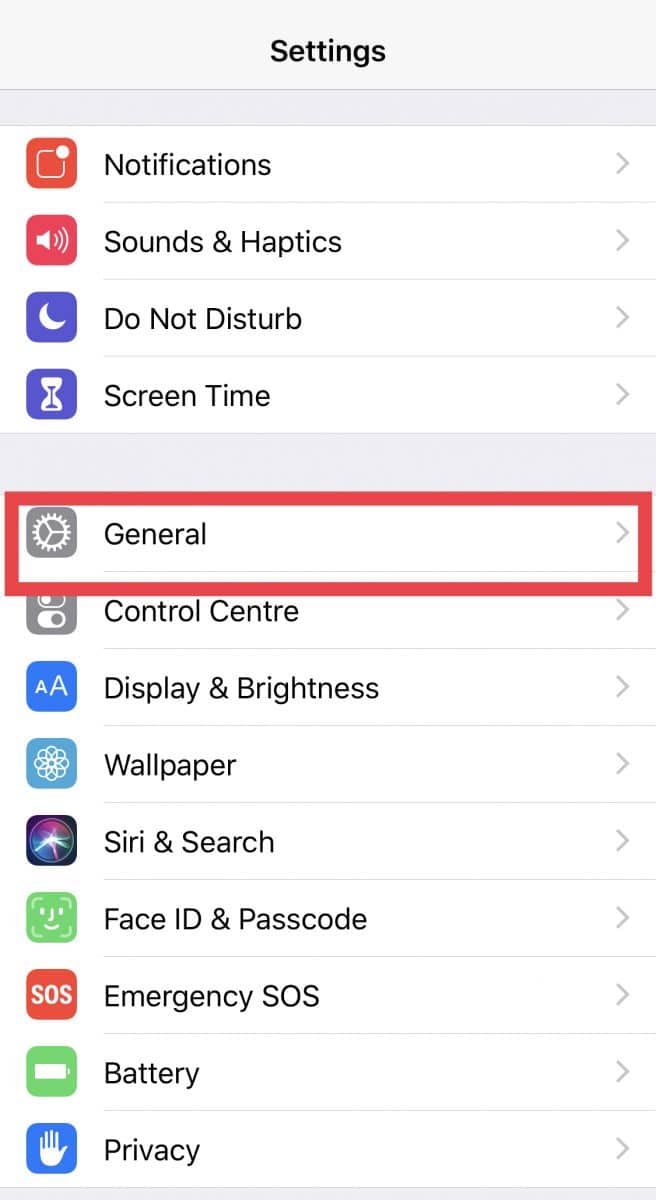


- Tap Settings
- Scroll down and click General
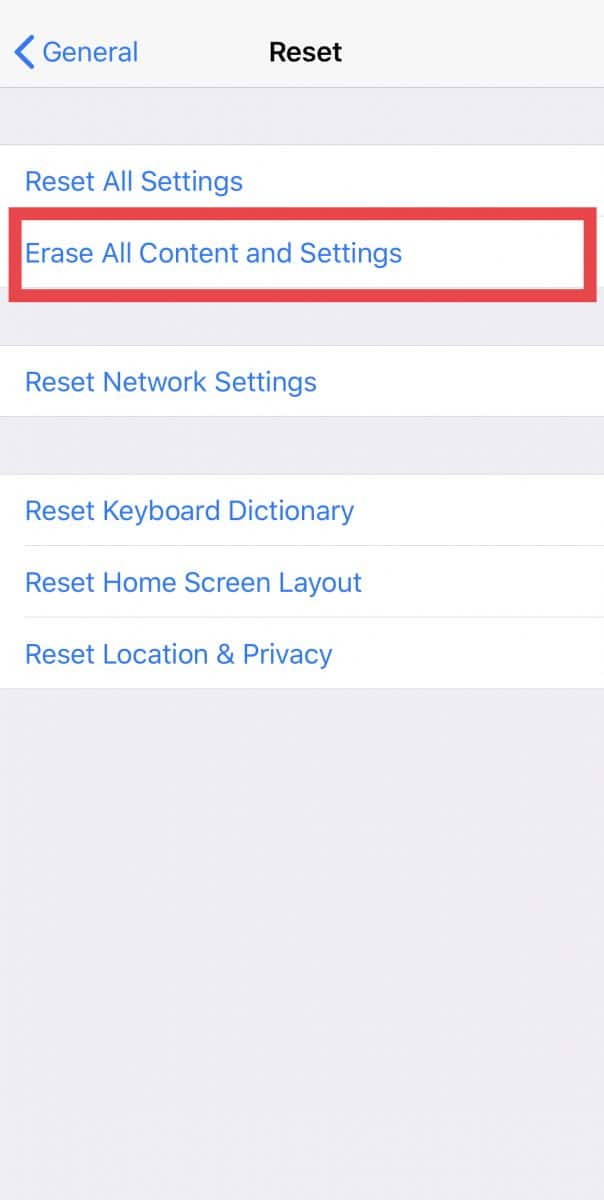
- Scroll all the way to the bottom and tap Reset
- Tap Erase All Content and Settings.
- On the Apps & Data screen, tap Restore from iCloud Backup, then sign in with your Apple ID.
- Select Choose backup, then choose from a list of available backups in iCloud.
- All your data will be restored to your device, including your photos, from the iPhone backup you picked.
How can I tell if I have the iCloud Photo Library turned on?
The iCloud Photo Library replicates your pictures to iCloud and any other devices you own.
On your iPhone, you can tell if you have it turned on by:
- Tapping Settings
- Tapping your name at the top of the screen
- Tapping iCloud
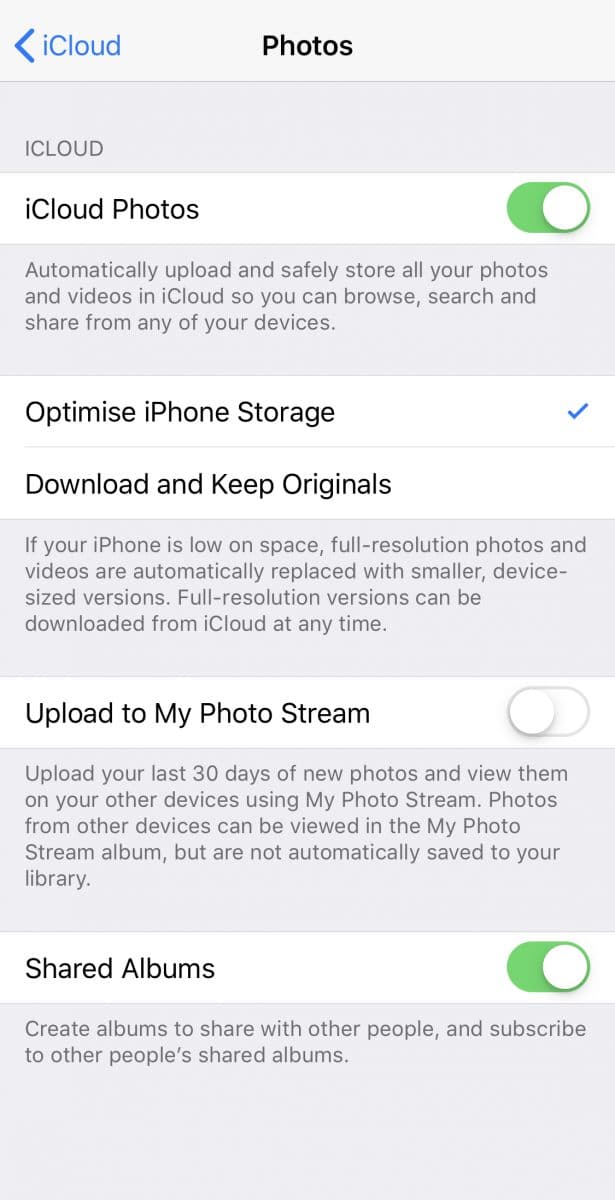
- You will see a list of the Apps using iCloud and Photos will appear at the top. It should say On or Off next to it.
Tap it. - If the switch is on (green) then you are using iCloud Photo Library.
- To toggle iCloud photos, tap the switch.
How to avoid losing important photos
The best way to ensure you don’t delete valuable photos is to make sure you are using a separate backup solution – not just the iCloud photo library.
You might assume that your pictures are already backed up via iCloud or iTunes, but they are not if you have enabled the iCloud photo library feature. Instead, you are synchronizing the pictures between your iPhone, iCloud, and any other Apple devices you own.
This means that whatever is on your iPhone is replicated across to your iCloud account, and on to all the other Apple devices you own.
Delete a picture on your iPhone and it is automatically deleted on iCloud and all your other devices. Or take a new picture and it automatically appears on all your other devices.
So how do you avoid pictures being deleted permanently and being unable to be restored?
The answer is to backup everything using a 3rd party photo App such as Google Photos.
I recommend Google Photos because it is free, easy to use, automatically copies pictures, and is reliable.
All you need to do is sign up for a Google account, install the app, and sit back comfortable in the knowledge you have all your pictures backed up to the cloud – even if you delete them from your device.
How to set up Google Photo on your iPhone and backup your photographs
- Make sure your phone is well charged and you have a good WiFi connection
- Go to the App Store on your iPhone and search for Google Photos
- Download the App
- Once downloaded tap the App
- You will be asked to sign in using your Google account
- Your pictures will start to be copied to Google Photos – it will take a while, depending on the size of your photo album
- Done, you now have a backup!
The best way to avoid losing important pictures is to make sure you do a regular backup. That way you can recover anything you lose.
To find out more, see How to backup iPhone and How to restore iPhone.
FAQ’s
Can I recover permanently deleted photos from my iPhone?
All photos deleted from an iPhone are stored in a folder called ‘Recently deleted photos’ for 30 days. After 30 days, or permanently deleting them you can only restore pictures from a backup.
Are permanently deleted photos gone forever?
After 30 days photographs deleted from an iPhone are permanently removed and gone from that device forever but you can restore them from a backup.
How long are deleted photos stored in iCloud?
A copy of deleted photos is kept in the ‘recently deleted’ folder in iCloud for 30 days. Simply sign in to your iCloud account using a web browser and use the Photos app in iCloud to recover the pictures.
How does the iCloud Photos Library work?
The iCloud photo library synchronizes pictures between all your Apple devices. It also keeps a copy of all your photos on your iCloud account. If you remove a picture from a device or your iCloud account, it will be removed from all your other devices too.
This means if you delete a picture from your iPhone you can’t go to iCloud and restore it.
Also, you can’t keep a picture on your Mac but delete it on your iPhone.
The contents of your photo library will always match on all of your devices and your iCloud account because they are linked.
Find out more about symbols in the iPhone Photos library.
I want to return all my photos I delete in iPhone 7